Advanced Debugging
A guide to using Wireshark when debugging complex use such as chained-connections or version specific issues. To test more complex issues, we may wish to use pyenv or Docker in our development environment.
Testing Supported Python Versions via pyenv
Let’s use pyenv to install Python versions under active development. Since development versions are pulled from a VCS, we wish to force install to get the latest commit before testing. The dependency plumbum needs to be installed as well (add [dev] for plumbum development dependencies). All together now!
versions=( 3.8 3.9 3.10 3.11 3.12 3.13.0rc2 3.14-dev)
for ver in ${versions[@]}; do
    pyenv install --force ${ver}
    pyenv global ${ver}
    pyenv exec pip install --upgrade pip setuptools wheel plumbum[dev]
    site="$(pyenv exec python -c 'import site; print(site.getsitepackages()[0])')"
    printf "${PWD}\n" > "${site}/rpyc.pth"
done
Each venv contains a .pth file that appends rpyc to sys.path. We can run rpyc_classic.py using pyenv like so.
PYENV_VERSION=3.10-dev pyenv exec python ./bin/rpyc_classic.py --host 127.0.0.1
PYENV_VERSION=3.9-dev pyenv exec python -c "import rpyc; conn = rpyc.utils.classic.connect('127.0.0.1'); conn.modules.sys.stderr.write('hello world\n')"
Unit tests can be ran using your desired Python version as well.
PYENV_VERSION=3.9-dev pyenv exec python -m unittest discover -v -k test_affinity
PYENV_VERSION=3.8-dev pyenv exec python -m unittest discover
Testing Supported Python Versions via Docker
Testing RPyC often requires that you use specific Python versions. Docker will make your life easier when testing RPyC locally, especially when performing packet captures of RPyC communication across Python versions. The current settings will use bind mounts to simplify synchronization of RPyC source code within the containers. So, remember to checkout the commit you desire the containers to use on your host!
If desired, individual containers can be specified started
docker-compose -f ./docker/docker-compose.yml create
docker-compose -f ./docker/docker-compose.yml start rpyc-python-3.7
docker-compose -f ./docker/docker-compose.yml start rpyc-python-3.10
The registry server can be started like so
docker exec rpyc-3.8 /opt/rpyc/bin/rpyc_registry.py
The containers can then be used to test to your hearts desire
docker exec rpyc-3.7 /opt/rpyc/bin/rpyc_classic.py --host 0.0.0.0 &
docker exec -it rpyc-3.10 python -c "import rpyc;conn = rpyc.utils.classic.connect('rpyc-3.7'); conn.modules.sys.stderr.write('hello world\n')"
Tips and Tricks
Display filtering for Wireshark
tcp.port == 18878 || tcp.port == 18879
(tcp.port == 18878 || tcp.port == 18879) && tcp.segment_data contains "rpyc.core.service.SlaveService"
Running the chained-connection unit test
python -m unittest discover -s ./tests -k test_get_id_pack.Test_get_id_pack.test_chained_connect
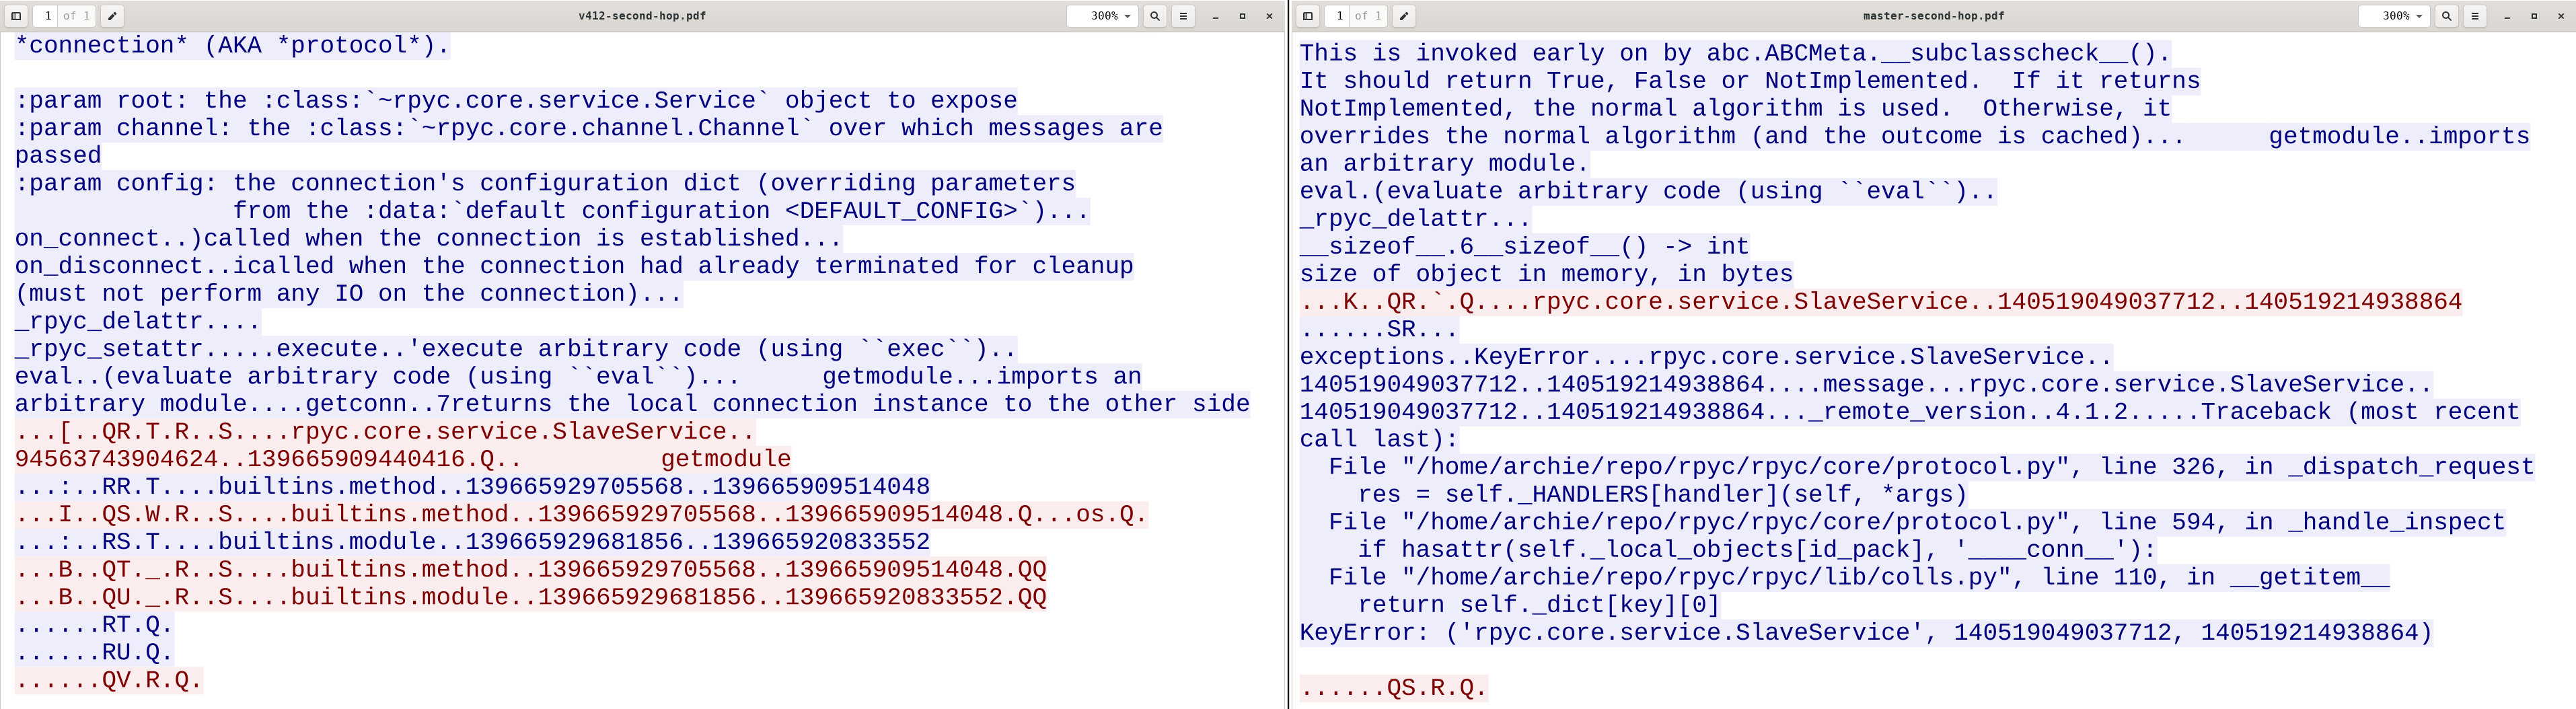
After stopping Wireshark, export specified packets, and open the PCAP. If not already configured, add a custom display column:
Title,        Type,   Fields,     Field Occurrence
Stream Index, Custom, tcp.stream, 0
The stream index column makes it easier to decide which TCP stream to follow. Following a TCP provides a more human readable overview of requests and replies that can be printed as a PDF.